As a former tomato gardener who's been consigned to apartment living, I made sure to get the VeggiePro with the free Heirloom tomato kit. It was delivered quickly.
I came home to see the box from UPS. It was a little beat up...
But happily, the box inside was in great shape, complete with sales slip.
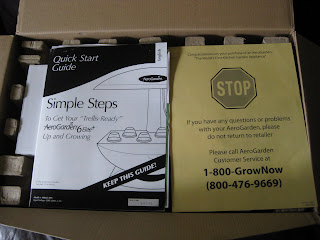
As I found with my other three Aerogardens, the package design of the VeggiePro was impeccable. Opening the box, you immediately see a Quick Start guide. The first thing I noticed is that the manual is for the AeroGarden Elite 6 Plus, which confirms my suspicion that the VeggiePro is essentially the same thing as what they'd been selling earlier as the Elite 6 Plus. I'm not complaining, because the price is at least $20 less, and it comes with the Heirloom Tomato kit and the Trellis kit, neither of which were included in the Elite 6 Plus.
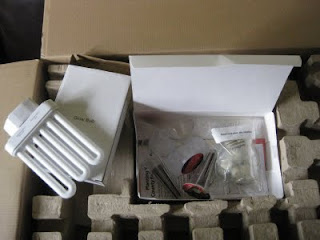
The box is packaged in layers with different pieces of the VeggiePro. The top layer contains one grow light (these are the new grow lights with more efficient and stronger light spectrum than the old style grow bulbs that I'm used to with my old 7-pod Aerogarden Classics.
It also contains the Heirloom tomato kit, with plenty of nutrient tablets, spacers, and two tomato seed pods. This is similar to what I saw with the cherry tomato Aerogardens--though there are six spaces in the AeroGarden unit for seed pods, only two tomato seed pods are included in order to give the tomato plants plenty of room to grow. The other four slots are filled with spacers that cover the holes so dust and critters can't get in.
The next layer in the box is the cover for the unit, as well as the trellis system (designed to keep the plants upright when they grow big)
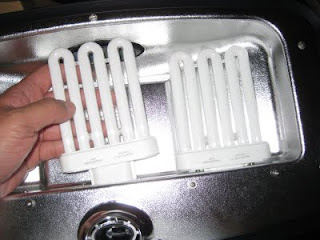
The bottom layer of the box is the base of the unit, along with the remaining two grow bulbs.
Even though I've gotten pretty good at assembling Aerogardens by now, I decided to follow their instructions and read the manual carefully again. Happily, the process was just as simple as it always is. The whole thing took less than 5 minutes.
The first step was inserting the arm into the base unit unti you hear a "click".
Step two was plugging the grow bulbs in until you hear a "click".
The next step was plugging the cord from the base unit into the lamp unit.
The next step was attaching the arm to the lamp unit until, you guessed it, you hear a "click". The arm is a lot thicker than the old Aerogarden Classic arm, because it extends to two full feet.
When I examined the unit closely, I noticed some differences between the VeggiePro and the earlier classic Aerogardens I have. I believe Aerogrow introduced these improvements with the AeroGarden 6 units. The biggest improvement is that the pump system no longer pumps water through the individual seed pods, but rather pumps water through the center of the unit, causing it to bubble up the middle much like a fish tank aerator. This is what the new pump system looks like:
Voila! The completed Aerogarden VeggiePro. I decided to put it in a corner of my living room. The instructions clearly state that vegetables needs a solid block of time of complete darkness, so I put the unit in a place where it could be completely dark between about midnight to 8 AM (the light cycle is on for 16 hours and off for eight). Also, I wanted to put it in a place far away from windows so critters won't get any ideas of setting up shop there. This is where my previous Aerogarden experience comes in handy.
The seed kit had a beautiful new brochure explaining how to grow the "county fair" line of vegetable seeds. I knew this was "hot off the press" because it had a error sheet correcting a mistake it had made in the book about which slots to plant the seed pods in.
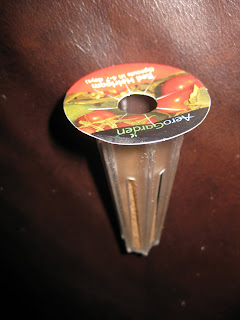
Speaking of the seed pods, this is what it looked it. It's much taller than the traditional Aerogarden pods I'm used to.
The next step was filling the base unit with exactly one gallon of water. I find that an old, cleaned out milk carton or in this case, a bottle of Hawaiian Punch is very handy for this purpose.
Following the instructions on the error sheet, I plugged the seed pods into the front two spots in the unit on the far left and right. The rest of the slots were filled with plant spacers.
As with the old Aerogardens, I put a plastic dome on top of the seed units so the seeds don't dry out and get the perfect amount of humidity and light.
As with the other Aerogardens, I added the two starting nutrient tablets.
Plug it in, and select "Vegetables" on the front panel, and the lights went on and the pump started pumping.
That's it. And so, Aerogarden #4 is on its way. Let's hope that the experience is more like the herbs and not so much like the cherry tomatoes or the peapods.


You'll love it! I have several Aerogarden 6 Elite Plus units, the Veggie Pro is pretty much the same, only cheaper, no stainless trim and with trellis. I've got two Veggie Pros on the way myself! The extra height, extra light units are the most versatile. I'm growing Chard and Green Beans in mine, from my own seeds. I just harvested some Pak Choi Toy Choi.
ReplyDeleteIf you haven't already joined, there's a great forum for Aerogarden owners at http://www.aerogardengrowers.com. I learned a lot about doing my own seeds over there. Everyone is really helpful!
Anyway, have fun growing with your new unit! Too bad about the snow peas. I still think I might try that experiment some day, I just have to figure out how I want to trellis them.
How is the new AeroGarden going? I have the Deluxe, it's been 8 days and still no sprouts for the tomato seeds.
ReplyDeleteHi Pam,
ReplyDeleteI've just updated the blog with the latest. It definitely took well over a week for my tomatoes to sprout. One thing I would recommend is to look under the plastic cover to see if some seedlings are bumping into the paper cover, i.e., not finding their way to the hole. See one of my later posts to see how I did it.
It's been over a month now and my seedlings are nowhere near where they should be according to the documentation. I'll continue to keep this blog updated with the latest.
I'm currently looking into buying one of these units but I only want to grow super chillies. Just need help deciding which one to buy. Also will the two feet of grow space be enough to harvests peppers
ReplyDeleteFor chilis, you'll definitely want to go with a "tall" Aerogarden like the Aerogarden ULTRA or ULTRA LED. Let us know how it goes! :)
ReplyDelete